Publishing in Storyline
When you publish in Storyline, there are ways that you can do so that work best with our LMS. Here’s a quick walkthrough of those.
Please note: This is NOT a guide on publishing in Storyline as a whole, this is simply the best way to do it for the LMS. This article will not go over every option and every setting, just the ones important for the LMS. We will also cover the basic options, but we will not go into detail about tracking, reporting, or anything like that. If you would like to know more about publishing in Storyline, or anything Storyline related, you can Visit their Knowledge Base.
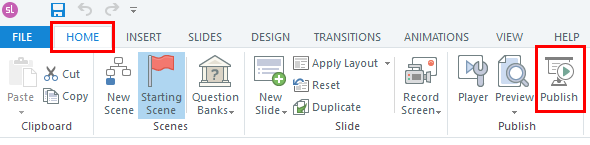
Under the Home tab of the top bar, click on Publish.
From here, there are two different ways you can publish for the LMS: Web and LMS. There are a couple differences between them:
Web is lightweight, and more efficient. We recommend using this whenever possible, especially if you expect a high volume of users to be accessing this course.
LMS allows you to track specific information, such as individual user clicks and other module interactions. It is, however, much heavier and slower than web and could potentially slow your site down if many users are accessing it at once.
The options are more or less the same for each, there are just a couple more settings and options for LMS.
Step 1) Among the sidebars of the publishing window, select Web or LMS.
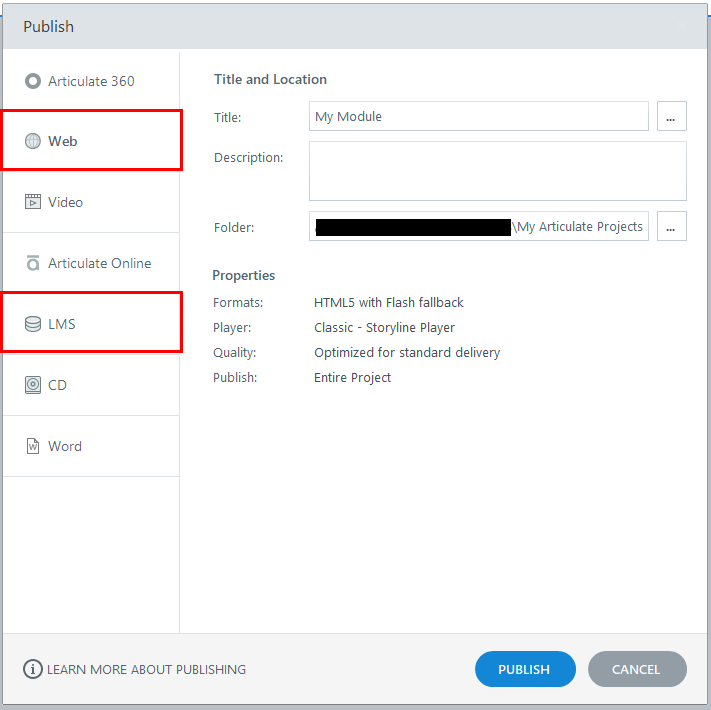
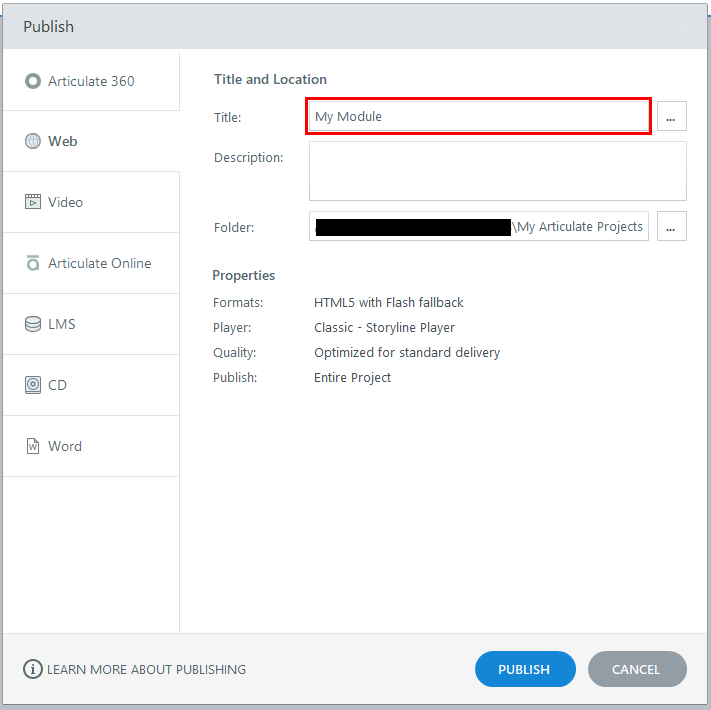
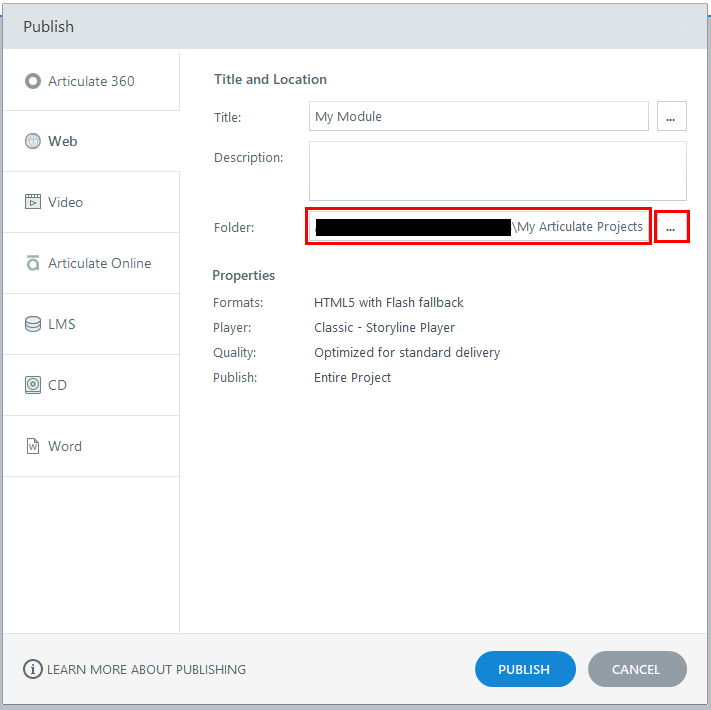
Step 2) Give your module a title.
Step 3) Choose a save destination. It will default to a My Articulate Projects folder (usually in your Documents folder), but if you would like to save it elsewhere you can click on the … button to do so.
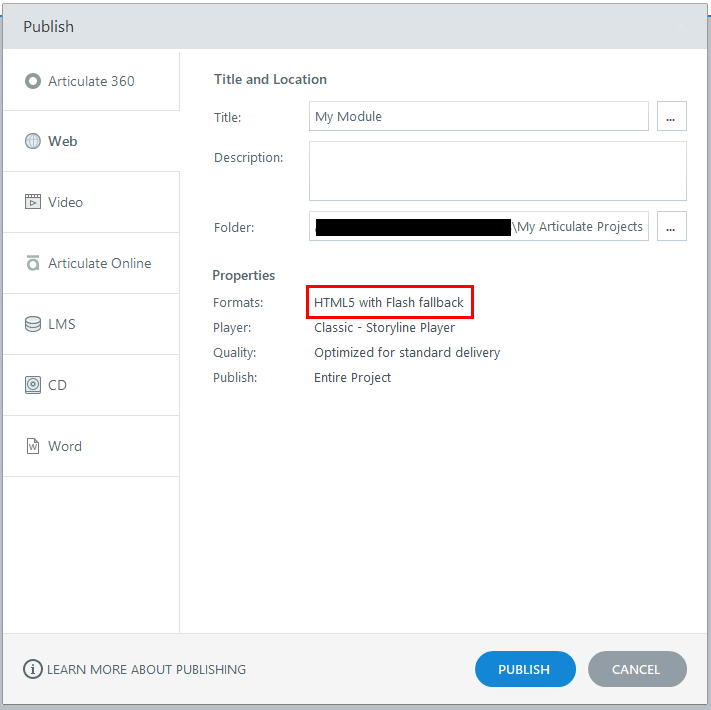
Step 4) Choose a publishing format. To make sure the module will display on older browsers as well as new ones, select HTML5 with Flash fallback. That is typically the default option, but if for some reason it is not set to that, simply click on whatever is there and you can select a different option.
Please note: if you are using the Modern player as opposed to the Classic, there is only the HTML5 only setting. This is not a problem for modern browsers, but if you have anyone using older browsers they will have difficulty accessing the module.
For publishing for web, that is all you need to do so you can click Publish. If you are publishing for LMS, however, there is another step you need to take.
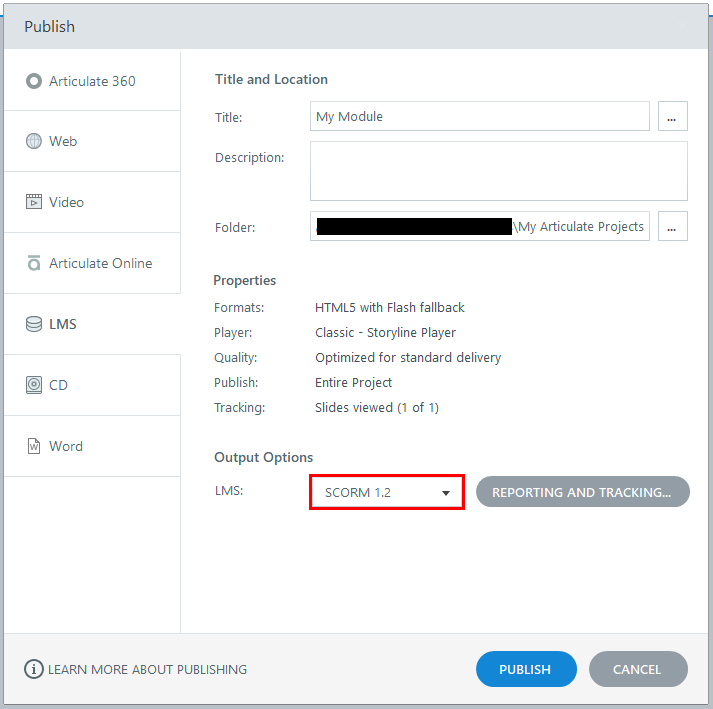
Step 5) Select an LMS output option. SCORM 1.2 is the default and the one we most often use, but you can also use TinCan as well. From there you can click Publish.
Publishing can take anywhere from five seconds to five minutes, depending on what you have in your module. If you have a lot of media and interactions and are choosing to track them, it may take longer.
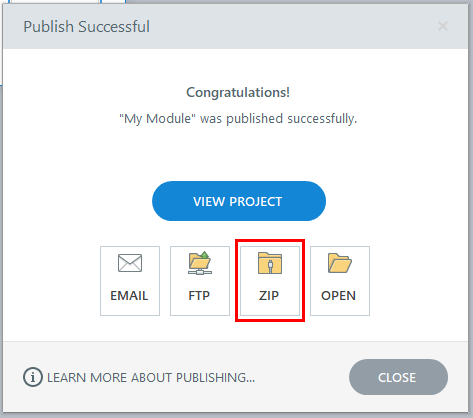
When your module finishes publishing, you’ll see this window pop up with different options to view/receive/upload your module. Select the ZIP option. Once you do so, a window will pop up which will allow you to save the file where you like. Click save, and then your module will be published and ready to upload.