While users have the ability to create their own accounts, there will be times when you may want to add users yourself. Administrators have the ability to add and edit the site users, no matter their account roles.
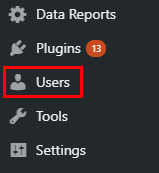
Step 1) Navigate to the list of users. There are numerous ways to get there, depending on the site. Some sites have a link in the top bar that says New, if you click on that and then select User you can get to the user creation page that way. The option that all sites have, however, would be to click on Users on the left-hand sidebar when in the backend of the site.
Note: there is also a User Registrations option on the sidebar of many sites. It is something different and will not give you what you are looking for.

Step 2) At the top of the page with the list of the site’s users toward the left side, there is a button that says Add New. Click on that button.

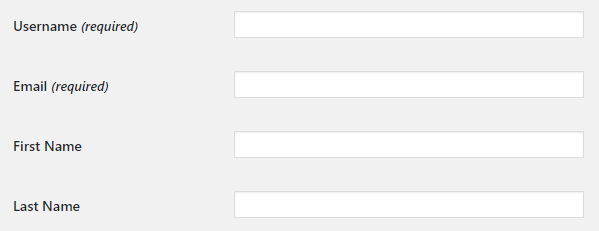
Step 3) Enter in the users information. Their username and email address are the only required fields, and they must be unique. We also recommend entering the user’s first and last name, so that it will populate on the certificates of any of the courses they take.

Step 4) These next fields are not mandatory, but many people will want to utilize them regardless. If you want to set someone’s password yourself, do so by clicking Show Password and then typing the desired password there.
If you do not want the user to receive an email upon their account activation, uncheck Send User Notification.
Next you can set a user’s Role. There are several different User Roles on our sites, which each have different permissions. This field will default to subscriber, but you can change it if you need to.

At this point, your user will be good to go. Many sites, however, also have an Organization field. To access that, scroll down toward the bottom of the page, it is typically underneath the Add User button. Simply select that user’s organization from the dropdown and you’ll be all set. Once all of your user’s information is entered, click Add User.
To edit any user you’ve added, simply click on their username via the list of users. You can add or change what you will, and then click Update User at the bottom when you’re done. The major difference when it comes to adding vs. editing a user come with their course data. When you’re editing a user, you can see all of the courses they’ve registered for.
